The Tile Studio interface
Get oriented in Tile Studio: My Tiles, the placement overview, and the tile-level Settings that shape everything inside.
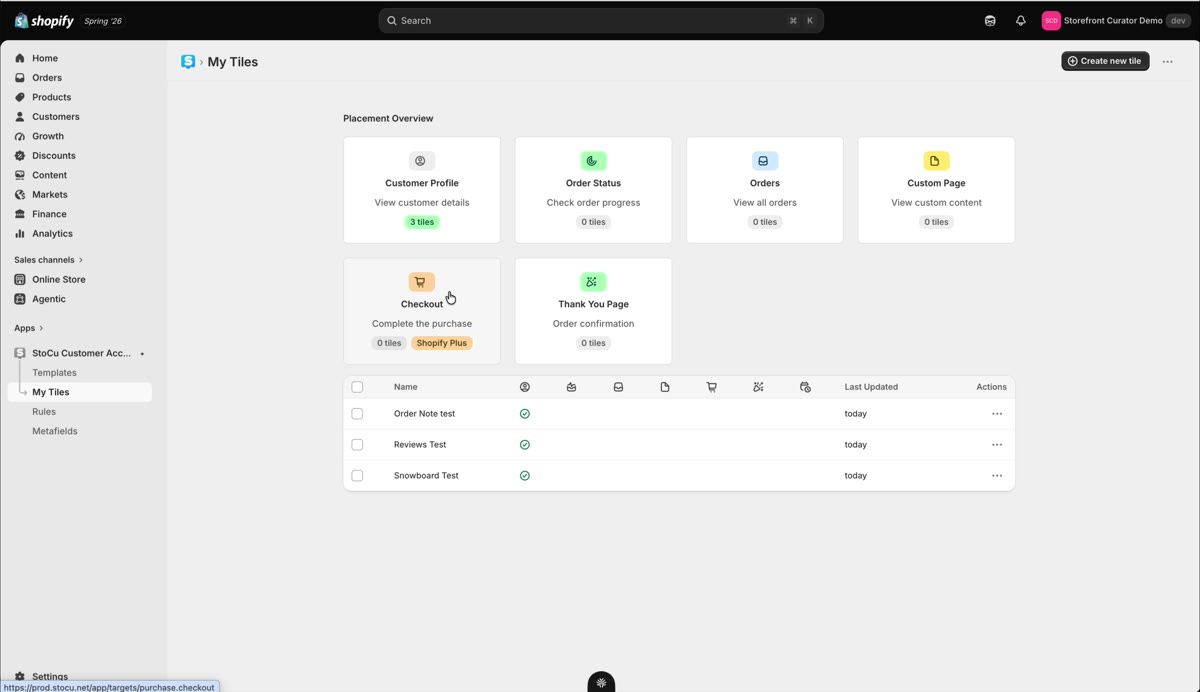
Once you have built a tile or two, it is worth a slower look around Tile Studio. A few pieces of the interface will save you real time.
Tile Studio has two modes, and the buttons at the top left switch between them. Guided is where a new tile starts: a few short questions, one step at a time, covered in Guided setup. Advanced is the full editor, and it is what this tour and the rest of this section describe. Your work comes with you when you switch.
My Tiles and the placement overview
My Tiles is your library. Above the list sits the placement overview: every surface you can curate (customer profile, order status, orders, custom page, checkout, and the thank-you page) with a green check wherever a tile is placed. It is the fastest way to answer "what is live where" at a glance. Checkout placement is available on Shopify Plus.
The list itself has a Variations column, so you can see at a glance which tiles show different versions to different customers.
The tile Settings
The Settings tab at the top of the editor holds the root settings for the whole tile. Everything you set here affects every element inside; master padding is the classic example, adding breathing room around the entire tile at once. There is a lot in here, spacing scales, gaps, and alignment behavior, and honestly the best way to learn it is to change things and watch the live preview react. The settings exist for reasons; the preview shows you the reasons.
The top bar
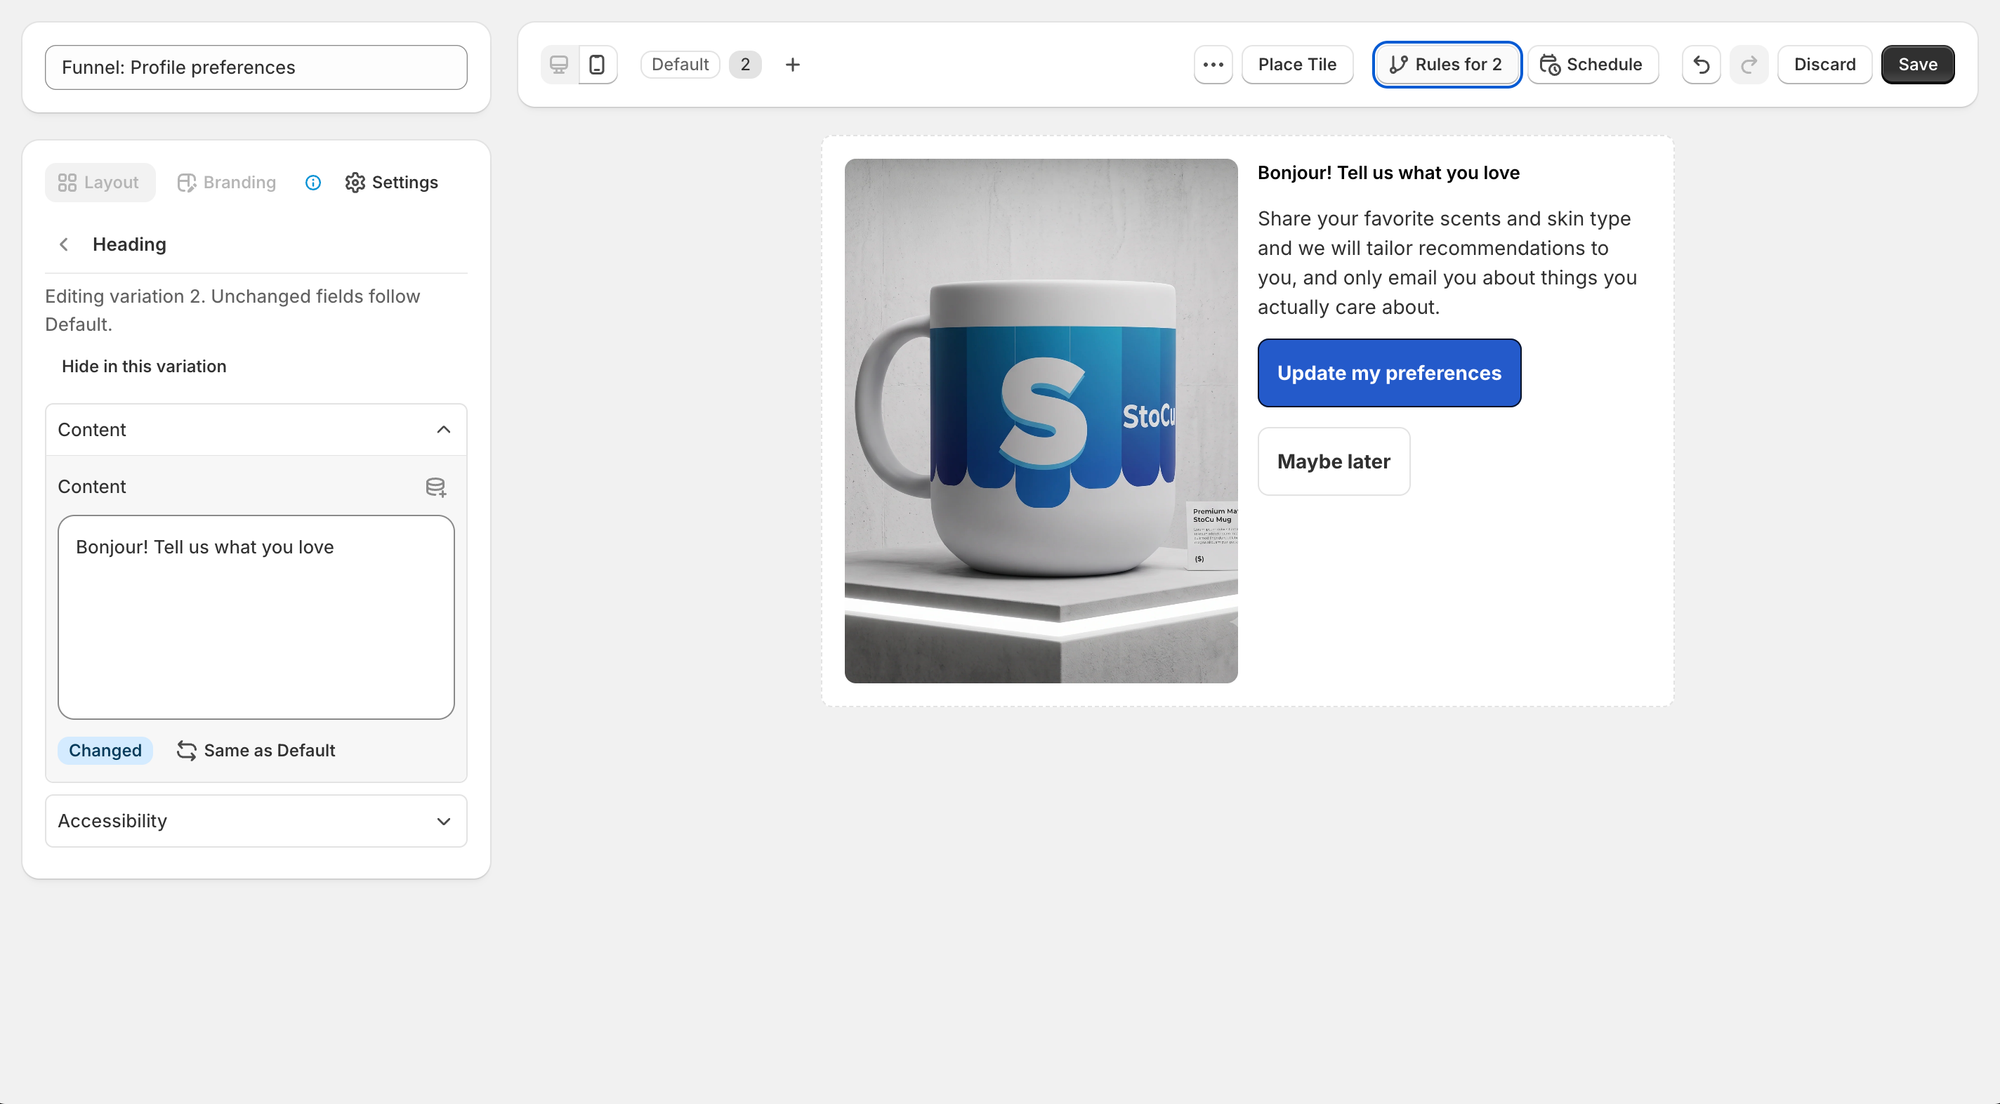
Along the top of the preview, from left to right: the desktop and mobile switch, then Default and a + for variations, the ⋯ menu (Save as Template and Delete Tile), Place Tile, Rules, Schedule, undo and redo, and Discard and Save. Undo steps back through your edits one at a time, so an experiment is always safe.
The layout list
Every Section, Column and Group row has a + that adds inside it, and an Add content line marks the end of each branch. Drag a row by its handle to move it, and everything inside it moves along.
One more tab you will see: Branding. It is coming soon. The goal is for the preview to pick up your store's brand colors and fonts automatically.