Meet your StoCu dashboard
A quick tour of the StoCu home screen: getting-started cards, tile metrics, and where to get help.
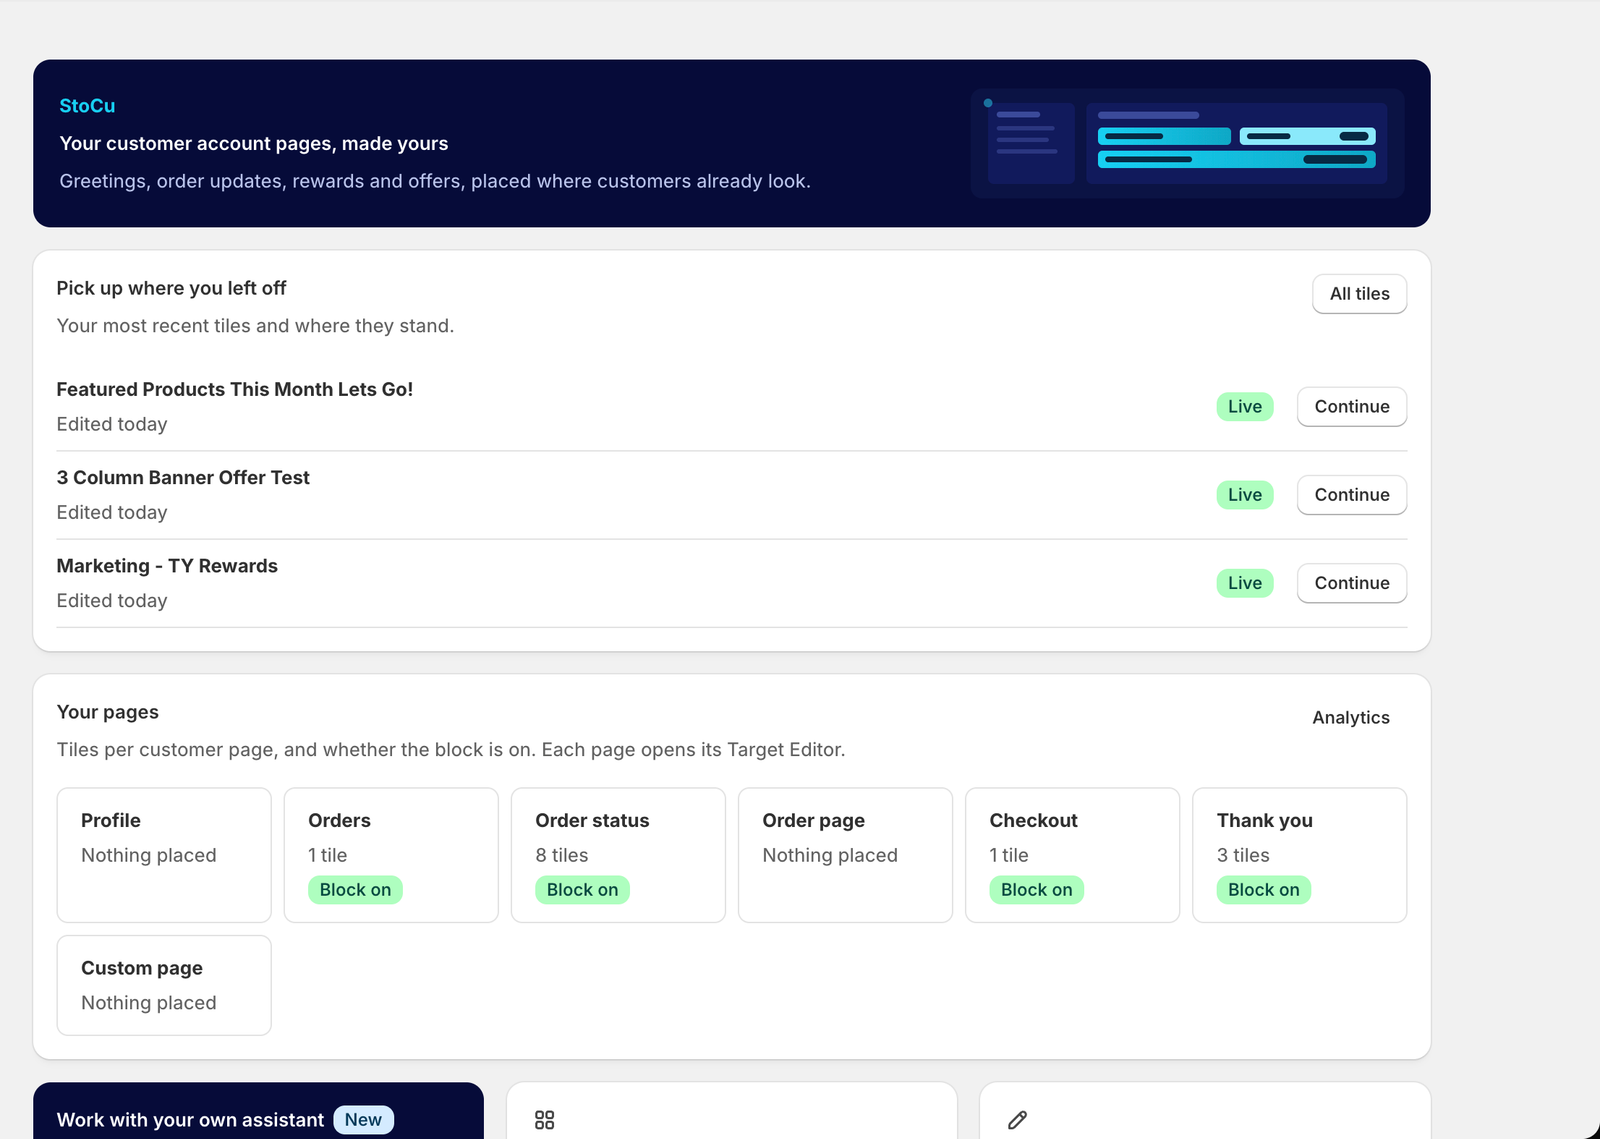
After accepting your trial you land on Home. It is built to answer two questions: what should I do next, and what is live on my store right now.
If you are new: the setup guide
A new store sees Set up StoCu, four steps that tick themselves off as you go: start your free trial, build your first tile, place it on a page, and turn on the block in Shopify. Each step has a button that takes you straight there. Building your first tile opens guided setup, which walks you through it one step at a time. Once all four are done the guide steps aside for good.
Next to it is a short, optional note to me. Tell me what you want your customer pages to do and I will point you in the right direction.
Pick up where you left off
Your most recent tiles, each with a status: Live means customers can see it, Block off means it is placed but the StoCu block is not on that page in Shopify's editor yet, and Not placed means it is saved but not on a page. Continue opens the tile in Tile Studio.
Your pages
One card for each customer page: Profile, Orders, Order status, Order page, Checkout (on Shopify Plus), Thank you and Custom page. Each shows how many tiles it holds and whether the block is on. Click a card to open that page in the Target Editor.
Three ways to build
Below that are the three ways to make a tile: work with your own assistant (connect Claude or ChatGPT), start from a template, or build it yourself in Tile Studio.
Where the numbers went
Views, clicks and scheduled tiles now have their own Analytics page in the menu. See Tile metrics.
Help is a real person
I am Jaren, the founder, and I answer the support inbox myself. The Help page in the menu has the guides and a message form that comes straight to me. More in Getting help.
Next up: Create your first tile.