Place your tile on an account page
Use the Target Editor to place your tile, then enable the StoCu block in Shopify’s editor so customers can see it.
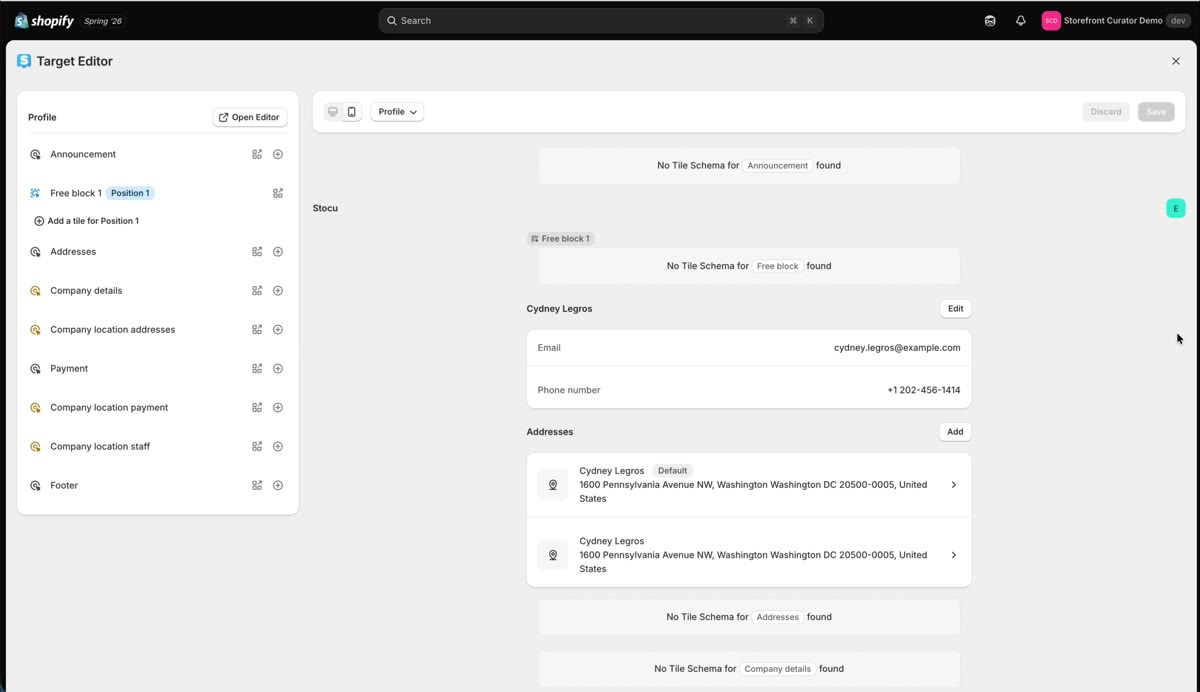
A saved tile is not on your store yet. Placing has two halves: choose where the tile goes in StoCu's Target Editor, then enable the StoCu block in Shopify's own editor. Once you have done it one time, it takes seconds.
The Target Editor
Hit Place Tile on any saved tile and the Target Editor opens. It is a preview that replicates your store's pages: nothing you do here shows on your store until the block is enabled in Shopify's editor. Across the top are the surfaces you can place tiles on: orders, order status, profile, custom page, plus checkout and the thank-you page (checkout is available on Shopify Plus).
Add your tile to a block
Each surface has named block slots. Click Add tile on a slot and pick your tile. When you fill a free block, another free block slot appears below it, so you can keep stacking placements. You will notice the slot says Not enabled; that is expected, and the next step fixes it.
Enable it in Shopify's editor
Click Fix in Shopify. This deep-links into Shopify's editor on the right page. Hit Add block, choose the StoCu block, and save. This is the step that makes tiles visible to customers: StoCu uses one extension per surface, and this is you turning it on.
Back in the Target Editor, hit refresh and the slot flips to Enabled. Your tile is live.
Good to know: there are two kinds of block slots, free blocks and static blocks. If you only ever place one tile per page you never need to think about it. When you want multiple tiles pinned to exact spots, read Block positions.
Next up: Enable, verify, and go live.