Sale planner: every tile for a sale, built in one pass
Tick what your sale includes, fill the details in once, and StoCu builds a tile for each page and each moment of the sale, placed and scheduled. Made for Black Friday and Cyber Monday.
A sale touches every page a customer sees after they sign in or buy: the bar at the top of their account, their order history, checkout, the thank-you page, the order they come back to check on. Building a tile for each of those, and for each moment of the sale, is a lot of small work in the busiest week of the year.
The Sale planner does that work in one pass. You tick what the sale includes and fill the details in once. StoCu builds a tile for each page and each moment, places them, and sets the time each one goes live and comes down. I built it for Black Friday and Cyber Monday, and it works for any sale with a start and an end.
Where to find it
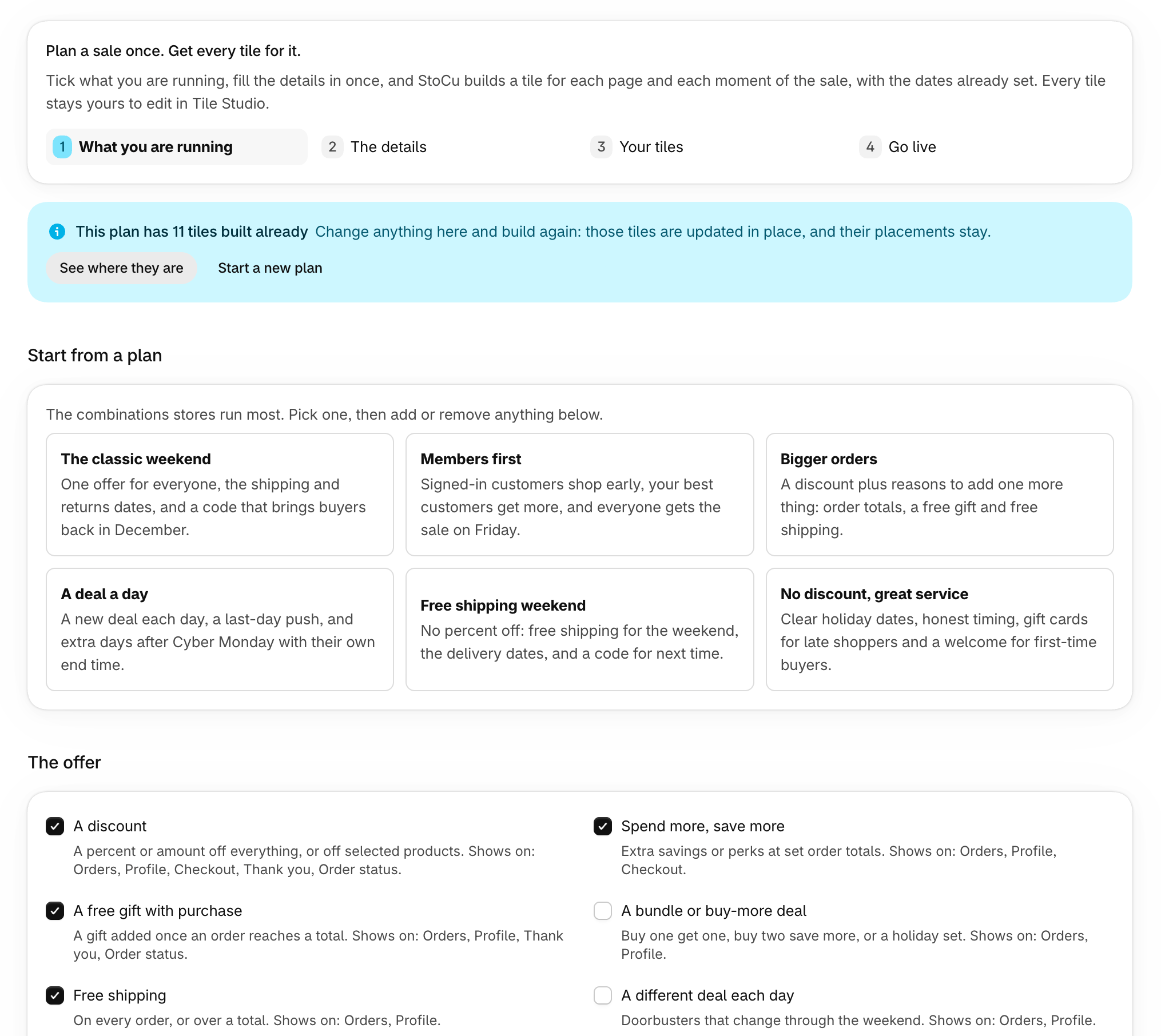
Open Sale planner in the StoCu menu. It is also on Home and at the top of the Templates page. The planner has four steps: What you are running, The details, Your tiles and Go live.
Step 1: What you are running
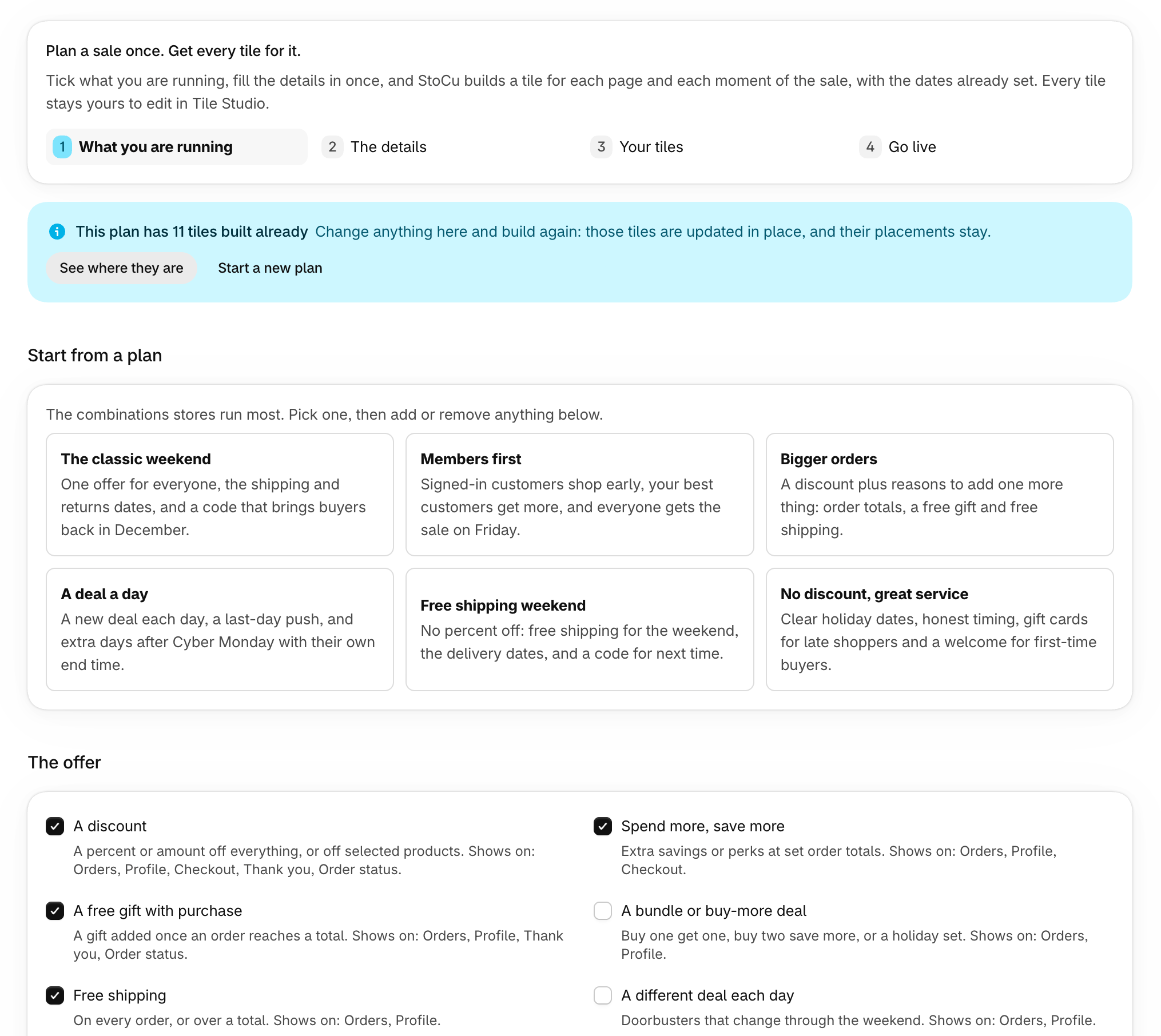
Start from one of six plans, then add or remove anything:
- The classic weekend: one offer for everyone, shipping and returns dates, and a code that brings buyers back in December.
- Members first: customers with an account shop early, your best customers get more, and everyone gets the sale on Friday.
- Bigger orders: a discount plus reasons to add one more thing.
- A deal a day: a new deal each day, a last-day push, and extra days after Cyber Monday.
- Free shipping weekend: free shipping, the delivery dates, and a code for next time.
- No discount, great service: clear holiday dates, honest timing, gift cards for late shoppers and a welcome for first-time buyers.
Under the plans are 21 things a sale can include, in four groups. Each one says which pages it shows on.
- The offer: a discount, spend more and save more, a free gift with purchase, a bundle or buy-more deal, free shipping, a different deal each day, a gift card bonus.
- For members and regulars: early access, a better deal for your best customers, a rewards perk, a perk for subscribers.
- Shipping, returns and gifts: holiday shipping cutoffs, longer holiday returns, a notice that orders take longer this week, gift cards for late shoppers, wholesale holiday ordering.
- After the sale: a come-back offer, extra days after Cyber Monday, a welcome for first-time buyers, a give-back, one question for buyers.
Step 2: The details
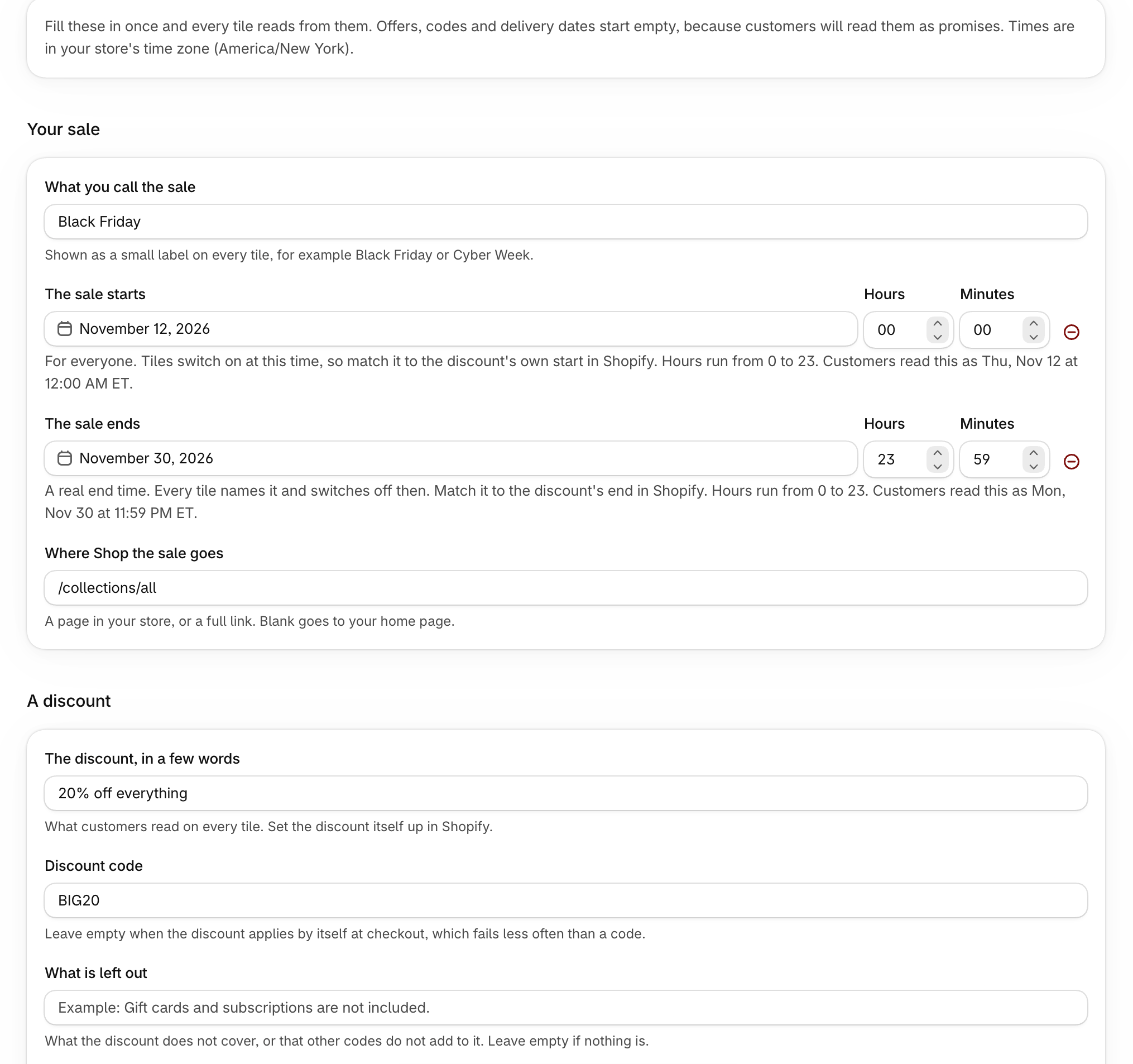
This step asks only for what your picks need. Every plan asks what you call the sale, when it starts and ends, and where the Shop the sale button goes. A discount adds the offer in a few words, the code and what is left out. Early access adds the day it opens and its code. And so on down your list.
A few things to know about this step:
- The dates start on the coming Black Friday weekend, in your store's time zone. Change them to fit your sale.
- The other fields start empty, with an example beside each. StoCu never promises your customers a discount, a delivery date or a return date that you did not type.
- The sale banner can carry a picture from your Shopify Files. Without one it is a words-only banner.
- The planner checks the dates before it moves on. An end before a start, early access that opens after the sale, or a day already gone by is named so you can fix it.
Step 3: Your tiles
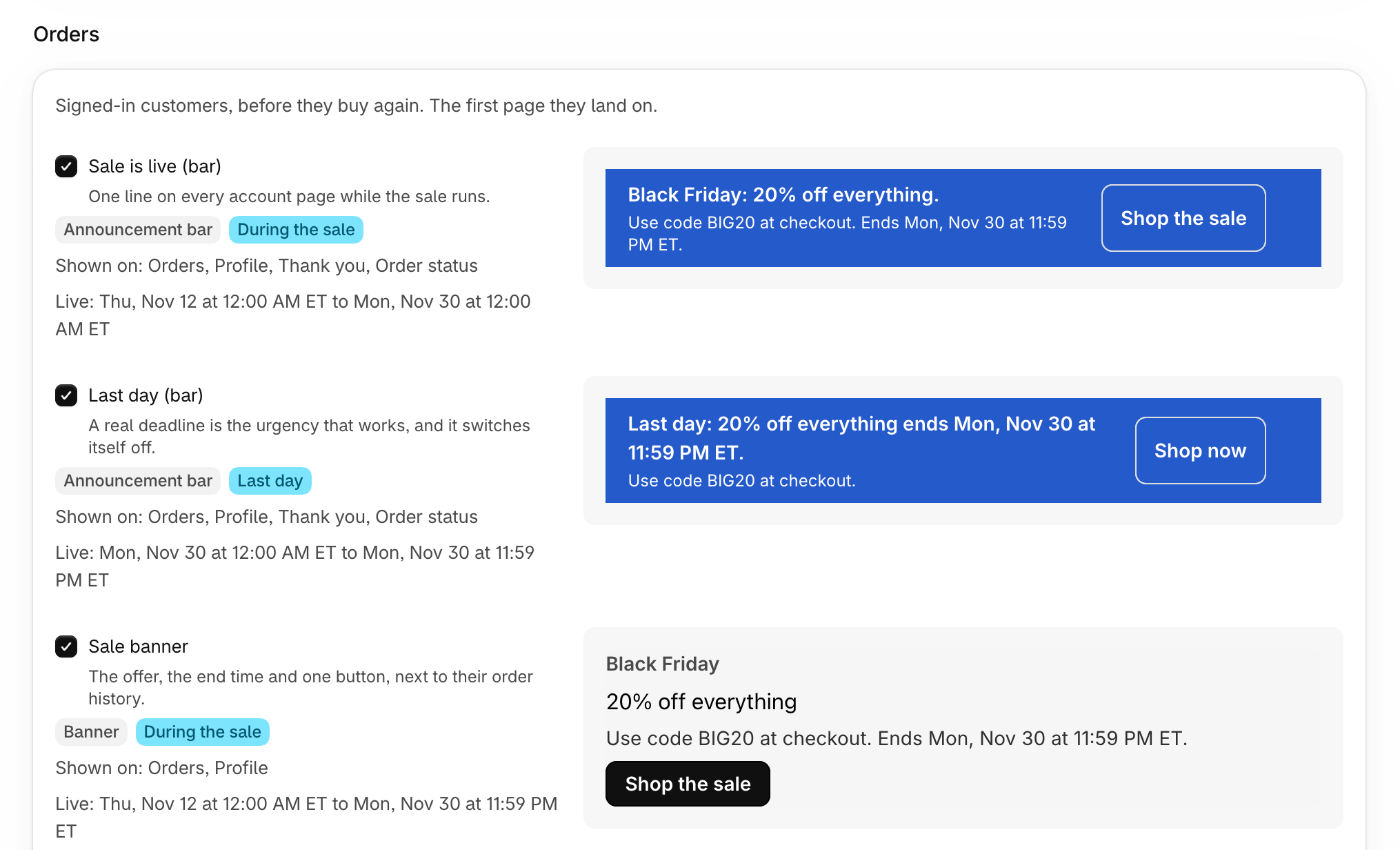
Here are the tiles your answers call for, grouped by page in the order a customer meets them: Orders, Profile, Checkout, Thank you and Order status. Each row shows what the tile is (an announcement bar, a banner, an offer, a notice or a question), which moment of the sale it belongs to, the pages it shows on, the time it is live, and a preview in your store's branding. Untick any you do not want.
The announcement bars hand over by date. Early access gives way to the sale, the sale to its last day, the last day to an extension if you run one, and then to your shipping cutoff. They share the one bar at the top of the page and never overlap.
Leave Place them on their pages now ticked and StoCu places every tile for you. A tile with a start time stays hidden until then, and a tile with an end time comes down by itself. Press Build. It takes a few seconds. Where a tile is meant for some customers only, such as your best customers, StoCu makes the display rule for it on your Rules page.
Step 4: Go live
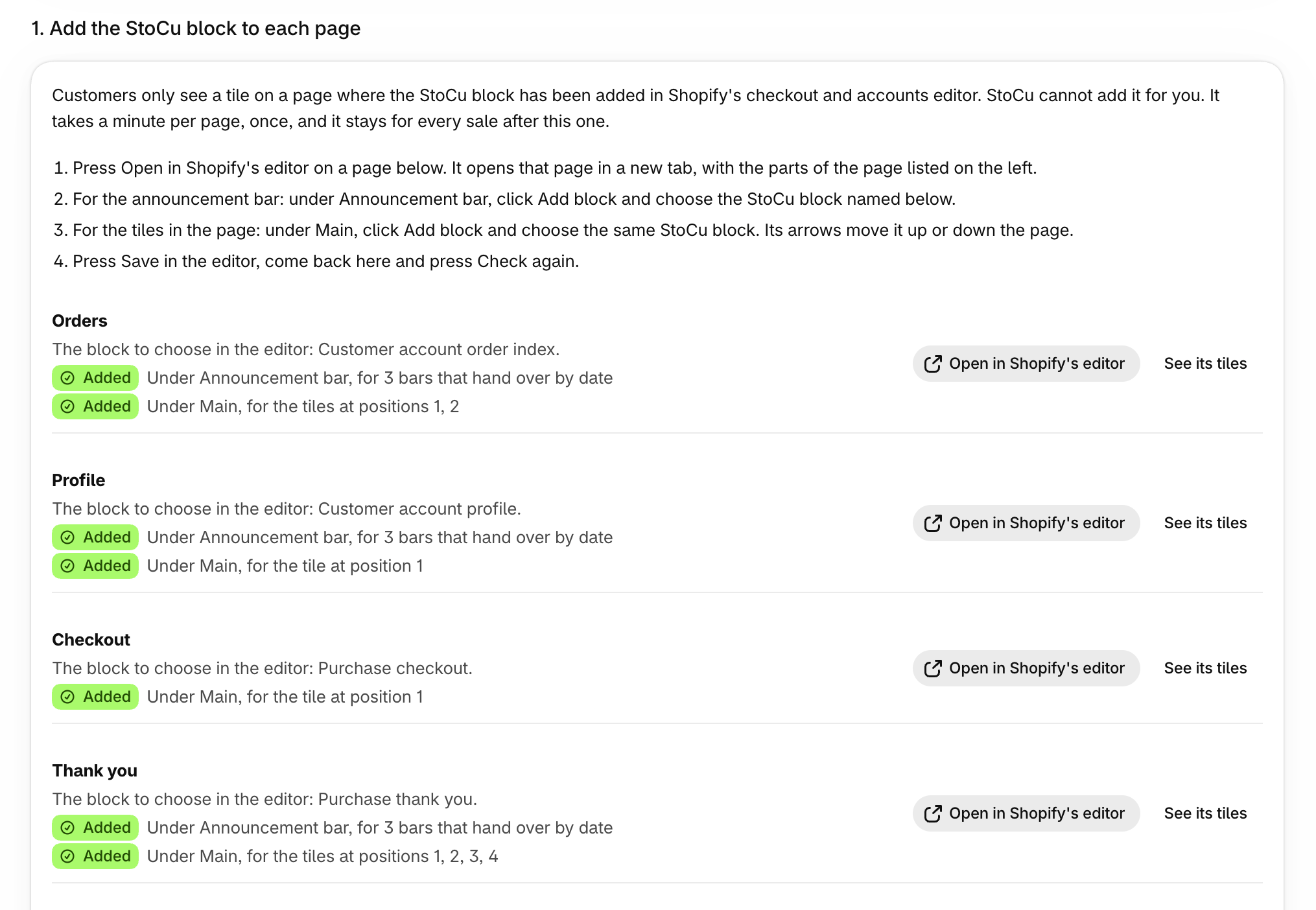
The tiles are built. Two things are left, and both are yours to do in Shopify.
1. Add the StoCu block to each page. Customers see a tile only on a page where the StoCu block has been added in Shopify's checkout and accounts editor. StoCu cannot add it for you. It takes a minute per page, once, and it stays for every sale after this one. The planner shows which pages have the block and which still need it.
- Press Open in Shopify's editor on a page. It opens that page in a new tab, with the parts of the page listed on the left.
- For the announcement bar: under Announcement bar, click Add block and choose the StoCu block the planner names for that page.
- For the tiles in the page: under Main, click Add block and choose the same StoCu block. Its arrows move it up or down the page.
- Press Save in the editor and come back. The planner looks again when you return, and Check again asks on the spot.
2. Set up the offers in Shopify. A tile only tells customers about a deal. Shopify applies it. The planner lists each discount to make, with its code and its dates. Make them with the same times as the plan, then test one order before the sale starts. A code that fails at checkout is the most common complaint of the weekend.
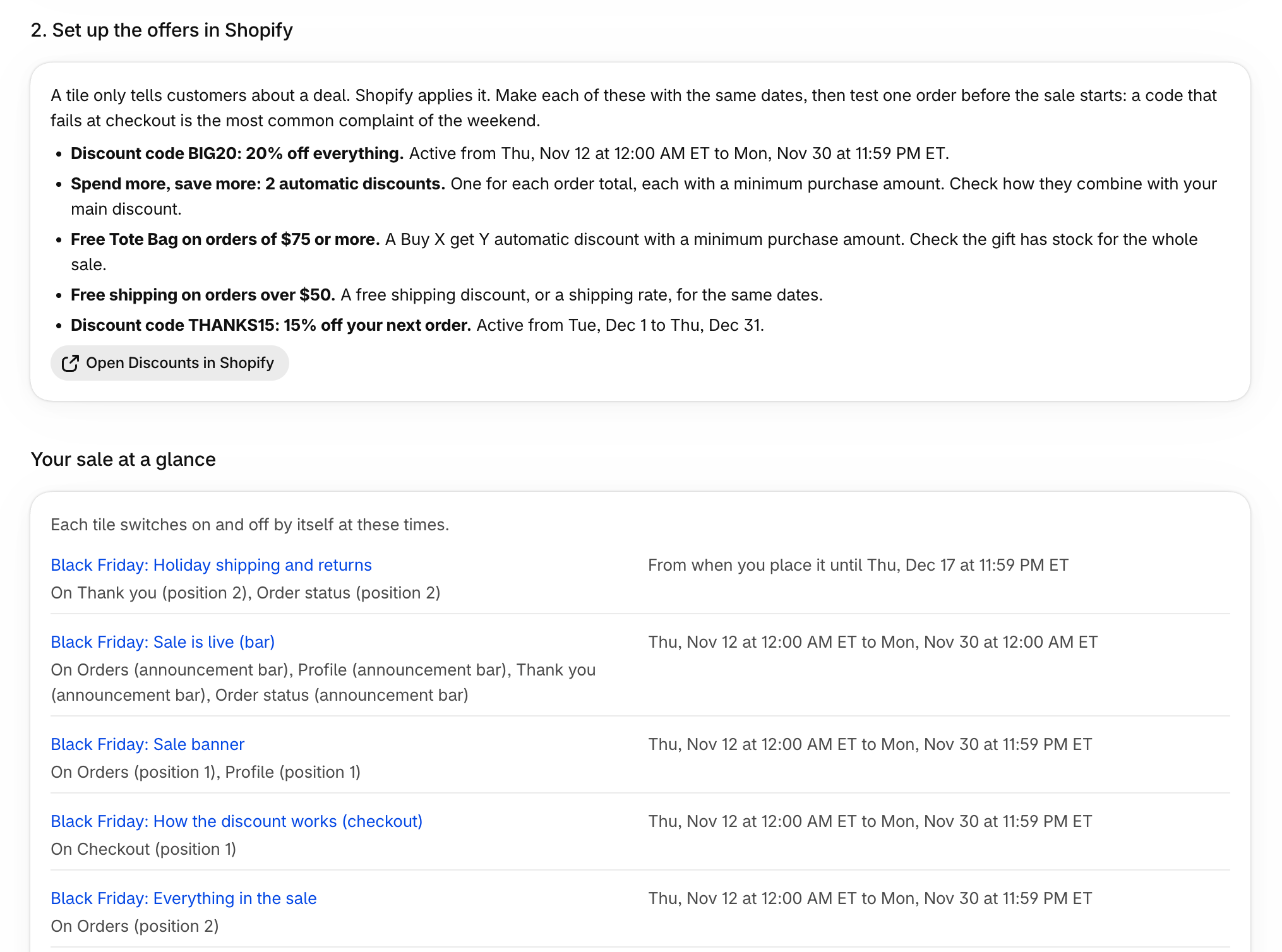
Under those two is Your sale at a glance: every tile, the pages it is on, and the time it switches on and off. Each name opens that tile in Tile Studio.
Change the plan later
Every tile the planner builds is an ordinary tile of yours. It sits in My Tiles, named after your sale, and you can open it in Tile Studio to change its words, its picture or its schedule. The announcement bars open in the bar editor. Saving a tile leaves it on its pages.
If the sale itself changes, such as a new end date or a bigger discount, come back to the planner, change the details and build again. The tiles are updated in place. Three options appear when a plan has been built before:
- Also rebuild tiles I edited myself. Left off, a tile you changed in Tile Studio is kept as it is. A tile that is kept also keeps its old dates, so move its schedule yourself if the sale dates changed.
- Take the tiles I no longer picked off their pages. This shows when you untick something you built earlier. The tiles stay in My Tiles either way.
- Start a new plan, on the last step, for the next sale. It asks whether the old tiles should come off their pages.
Who sees which tile
- The Orders and Profile pages are for signed-in customers, so early access and member offers go there.
- Checkout tiles need Shopify Plus. On other stores the planner marks them and leaves them out.
- A version for your best customers shows to customers who carry the tag you name. Everyone else sees the regular tile. This uses tile variations and a display rule.
- The question on the Thank you page shows to signed-in buyers only, because the answer is saved to their account. A buyer who checked out as a guest does not see it. More in Forms.
- On the free gift tile and the welcome for first-time buyers, the part that reads a customer's own order shows to signed-in customers. Everyone else sees the general offer.
- Shopify paints the announcement bar in your store's accent color, which you set in your checkout and accounts branding. StoCu does not choose it. Look at your first bar in Shopify's editor to see how it reads.
On the Launch plan
Schedules, display rules and variations come with Essential, and so do checkout tiles and tiles meant for some customers only. On Launch the planner builds the rest of your tiles without a schedule and does not place them for you. The last step becomes Your sale, day by day: the day to place each tile and the day to remove it, which you do from Place Tile in Tile Studio. See Plans and trial.
Good to know
- The planner shows every time in your store's time zone. Tile Studio's Schedule control shows the same moments in UTC.
- A link you type as a path, such as /collections/sale, is written out on your store's main domain so it opens your storefront from an account page.
- If your StoCu blocks use the Position setting, a block with a number shows only the tile at that position. The Go live step lists the positions the new tiles took. A block with Position left empty shows every tile on the page. More in Block positions.
- A change to a tile takes about a minute to reach your customers' pages.
- Related: Announcement bars, Scheduling and Guided setup for building one tile at a time.
If you would like a second pair of eyes on your plan before the weekend, write to me from the Help page in StoCu. I read every note.